
It's a 5 x 7 magnetic board that is framed with designer paper.
I purchased a 5 x 7 mat from the dollar store and covered it with designer paper (TAC). Then I cut a piece of chipboard the same size for the back and covered it with the same paper using a glue stick. Roll your clean brayer over both pieces a couple of times to make sure that the glue is adhered really well. Cut your magnet sheet to size and glue it down onto the back panel. (You can find the magnet sheets at any office supply store, Wal-Mart of even the dollar store.) Add ribbon for hanging and then glue down the frame.
You can embellish this further if you so desire. I can picture some flowers, chipboard letters to spell out a name, etc. Wouldn't this be fun on a teenagers bedroom door? Or a "Honey do" board....the possibilities are endless!

To make the magnets - I used page/picture pebbles, crystal lacquer (diamond glaze, etc. any clear glue will work), saying stamps and magnet strips cut to size. Stamp your sayings in stazon or palette hybrid ink, adhere the crystal lacquer to the page pebble and set down over your word or saying. Press down so that you get a good seal. After they dry, add the magnet to the back. Some pebbles are self-adhesive - however I decided to add the crystal lacquer so that they would last a bit longer.
 These are done the same way but with Tulip Brand See Through Stones. In both examples, I used designer paper from The Angel Company because of the bright colors in the paper.
I hope this sparks your creative juices! If you create something similar, drop me a comment, I'd love to see it!
Have a fantastic weekend!

Supplies:
Designer paper - A little Whimsy by The Angel Company
Stamps - Tag Tid Bits from The Angel Company
Ink - Palette Noir
Crystal Lacquer
Page/picture pebbles
Tulip Brand See Through Stones
Magnetic sheet
Magnetic tape


 The Sentiment is from Alota Rubber Stamps. I added an outline with Copic Cool Gray marker and then added the dots around it so that it went with the main image. I used the ticket punch to punch the corners and added some mini black brads. I found some purple grosgrain ribbon in my stash that matched the Core'dinations card stock that I layered everything with.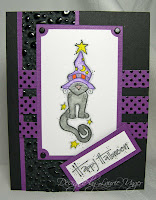

 The card starts off with a piece of card stock measuring 12 x 4 and ends up when folded a 4 x 4 pocket card. I'm sure all of you have seen this before, but if not, leave me a comment and I'll get you the instructions.
 The designer paper is from DCWV "Once upon a time" pack. The pink card stock is Core'dinations. The black circle is one of those things that came about by mistake. I cut a circle with my nestabilites and it was too big for the project I was working on. So I chose another die and cut it again - wow - that skinny circle looks cool - wonder what I can use it on? You know how it goes...The sentiments and the swirl are from The Angel Company. I used cloudy coral chalk ink from Memories to stamp everything. The ribbon is a close match to the ink and paper, but not perfect! The back side of this card is also covered with the same designer paper, which hides how I attached the ribbon.


