Sunday, December 30, 2007
Product Review - JustRite home stamp making kit
I saw this kit on CraftTV weekly (the scrapbook lounge) demonstrated by Tricia at clubscrap, and I thought "How flippin cool is that!" So, I mentioned this to my DH as a possible Christmas present! Guess what I got?
So, here I am, just dying to jump right in on Christmas day and start making stamps, but I had to wait for my company to leave before diving in. I'm also thinking to myself that there's no way that I'm ever going to be able to make a stamp like Tricia did. My doubting self decided that we would at least give it a try.
After two failed attempts at making a stamp, and using several four letter words that can not be typed here, I'm still thinking that this is never going to work for me....my talent and patience is at it's end! It's because I'm trying to create my own designs and it's not working, or maybe I missed a step in the directions...Have you ever had that happen to you?
Then I had happen to see this template in my paper holder and decided to give that a try. It's bold, it's paisley swirls, it would make a really cool background stamp! This time I read and re-read the directions to make darn sure that I followed everything to a "T"....guess what? It worked! I was so pumped! What's that quote? "You always make a rough draft before creating the final masterpiece.” In my case it was several rough drafts....LOL!
Here is the template and the negative I created to make my stamp:
This is the actual stamp I made!
I have to tell you that I have to give this kit a two thumbs up! Even after all my goof up's, this is still something that works! You wont be a great stamp designer overnight or make the kind of stamps your used to, but this is sure fun to play around with. The kit comes well stocked with lots of pre-printed negatives and a cd with more images to use! What I like is the ability to be creative and this kit gives me the flexibility to make anything I want. Sometimes you need a specific stamp for your scrapbook layout or card and it doesn't exist....this gives you the ability to make your own!
This is the background I created. It's stamped in white craft ink and then embossed. I also did the direct to paper blue jeans technique.
Here is the card that I made with my background stamp.
Supplies:
Main stamp image: TAC swirly gigs, sentiment from TAC live inspired
Inks: Palette starry night, white craft ink
Glaze gel pen
You can view and order the kit here and it also has a link to the Scrapbook Lounge, too.
Thursday, December 27, 2007
Card Sketch #43 - Distressed
Here is sketch #43. I did a lot of distressing on this one, actually I was playing around and ended up with this!
I bought some of that new distress crackle paint that Tim Holtz just put out! This stuff is great and so much fun to play with! I painted it on some acetate and the results were, well you can SEE for yourself! It's mounted onto some brown cardstock so that the crackles stand out a bit more. I also used it on the main panel, and stamped over it.
The back ground panel was done using the direct to paper technique with creamy brown chalk ink and distress ink in walnut and tea dye. It ended up looking a lot like bark from a birch tree. I matted both of my distressed panels and then glued them together. For a different look, I decided to layer them together and matted it using a piece of taupe cardstock, then added black behind that. I used my window word punch on the same color cardstock and stamped a phrase on one, and added black brads. All three are up on dimensionals. Lastly, I decided to add a bit of a girlie touch to this very masculine card by adding the ribbon at the bottom.
Supplies:
Distress crackle paint by Ranger in antique linen
Acetate
Distress inks by Ranger in Walnut and Tea Dye
Chalk ink in warm brown
Palette ink in Noir
Stamps: Artfully Asian by SU (colored in with a green gel glaze pen)
Just a note sentiment by Studio G
Black brads
Brown ribbon
All cardstock by DCWV
The Angel Company new catalogue!
The new catty arrived at my house the day before Christmas! What a great Christmas present from TAC! The picture on the right is the new cover.
There are quite a few really cool new paper packs that are a "must" to get!
Here are two of the new packs for you to get a sneak peek at.
I also scanned a few pictures of some of the new stamp sets that are on my wish list! We begin taking orders out of the new catty on January 2nd.
There are quite a few really cool new paper packs that are a "must" to get!
Here are two of the new packs for you to get a sneak peek at.
I also scanned a few pictures of some of the new stamp sets that are on my wish list! We begin taking orders out of the new catty on January 2nd.
Wednesday, December 19, 2007
Nugget box with Acetate
I made this 8 nugget box and decided to try putting a cut-out on the top and back it with a transparency. I think it came out very cute and decided it was worth putting on my blog.
Paper is from the Paper Company called Snowflake Stripe. I used my Spellbinders Nestabilities die to cute out the rectangle in the center. I taped a piece of transparency on the back. Make sure to use the red liner double sided tape to get a good hold!
I used Papertrey's Holiday Treats stamp set to make the wrappers for the Hershey's nuggets and for the round sentiment. I used colorbox chalk inks in Wisteria and Azurite that went well with the designer paper. I added two ribbons to match the paper! However, I think I'll take off the purple one and just go with the blue. Keep it simple....hmmm?
Sunday, December 16, 2007
Card Sketch #42 and a technique!
Here's twist for you. A card sketch and a technique all in one!
I started off doing my technique challenge #38 over at a shade of blue and liked how my card was turning out and decided to sketch it, too!
The main panel is done using the faux silk technique using tissue paper. I also stamped the flower sprig with versamark and embossed with clear embossing powder for the background panel. Both of these are layered with brown cardstock. The sentiment was stamped on ivory paper and layered with pink to match the flowers. I used Marvy LePlume markers in pale pink, bubble gum pink and leaf green to color in the asian flower. Pink brads were added to finish off the card. Be sure to click on the "A Shade of Blue" challenge blog tag to your right to get the details on how to do the faux silk technique!
Supplies:
Stamps - Stampin' Up! Artfully Asian
Sentiment stamp - Savvy Stamps
White tissue paper
Brown and ivory cardstock
Ivory paper from HOTP
Pink Brads
Samm's take on sketch #41
Hi everyone....take a look at this from Samm on sketch #41! Nice job Samm!
Friday, December 14, 2007
Card Sketch #41 - Holly
I do believe this will be the last card done with a Christmas theme. LOL!
I bought this new stamp set for 50% off at Craft Warehouse and had to use it as soon as I got home. This is the sketch I came up with while playing around.
I used green cardstock from DCWV as the base, the white core kind. I didn't particularly care for the white showing when I scored the fold on the card, so I ended up lightly distressing the outside edges.
I stamped the holly in warm green and deep green chalk ink from colorbox. The shadow stamping was really easy to do since these stamps are the clear kind. The red berries are stamped in Palette Moulin Rouge, as is the sentiment. The back ground designer paper is sepia music by Colorbok, which I bought at Michael's. I thought the music sheet went very well with the sentiment, it just reminded me of the song! (giggle) I matted both of the squares using DCWV red cardstock. The strip down the left is done with the same designer paper and red cs. I added a green grosgrain ribbon and tied it in a flat knot.
As I stood back and looked at this, it seemed to me that it was missing something....So I ended up adding some paper piercing around the corners of the two squares. Ok, I think I'm done! No, wait...I need to add some bling to the berries with my stardust glitter pen! Now I'm done!
Supplies:
Clear Stamps: Holly set by Impression Obsession
Paper: DCWV red and green cardstock
Designer paper: Colorbok Sepia Music
Grosgrain ribbon
Inks: Warm and dark green chalk ink by colorbox, Palette Moulin Rouge
Sunday, December 9, 2007
Card Sketch #40 - Red sparkles
Here's another easy sketch design, but with a twist on the fold. I left a 1/2 inch on the right side to add my sentiment.
The main image is something that I saw done on SCS and thought it was just wonderful in its simplicity and style. Therefore I cased the idea of adding the ornaments to the tree and used it in my sketch. The glittery red balls are done using Xmas red stickles. I matted it with red and green cardstock, but chose to distress the green.
The background panel is done using the weave backgrounder stamp. It's stamped in white craft ink and then embossed with clear ep. I then took my warm green chalk ink and added color using the direct to paper technique, wiping off the excess as I went.
The sentiment on the side was done off of my computer since I don't have any vertical Christmas sayings. It was printed in green on white adhesive mulberry paper and then cut to fit. I took my stipple brush and lightly added some warm green chalk ink to match the rest of the card.
Supplies:
Pine tree stamp from Lovely as a tree - Stampin' Up!
Weave background stamp - SonLight Impressions (CHF)
Green and red cardstock from DCWV
Red gingham ribbon
Xmas Red glitter stickles
White craft ink from Joann's
Chalk ink in warm green from colorbox
Clear embossing powder
Monday, December 3, 2007
Card Sketch #39 - Noel
This card measures out to a 5x5 square. I started with a piece of ivory card stock cut to 11x5. I scored it at 3 1/2" on the left side and 2 1/2 on the right. I matted the designer paper with green card stock and centered each on the front panels. I used brads for the handles to hold the gold bow closure in place. Make sure you leave some room with the brads (don't smoosh down all the way) to hold your ribbon or whatever you use for your closure.
I stamped my sentiment on a piece of acetate with versamark and embossed using gold EP. I mounted the actetate on the designer paper with gold brads. I covered all the brad butts up with additional ivory card stock to finish off the look of the card.
Supplies:
Ivory card stock
Green card stock
Designer paper: K&Company (Elizabeth Brownd)
Acteate (transparency from the office supply store)
Sentiment stamp - ???? got it at a stamp show a few years ago, no idea who made it.
Gold brads
Gold cord
Another note of interest - for all of you who haven't been watching the news today (Monday) - mother nature really stomped on us out here in the Northwest. Wind, record breaking rain, flooding.....It's been fun! Thankfully, I have a hobby that let's me unwind at the end of the day! Without it, I would've gone bonkers with what I went through today! Quite frankly, I'm counting my blessings....I could be in the Northeast right now....with all the snow. I think I'd rather be here.
Thursday, November 29, 2007
Card Sketch #38 - Angels Sparkle
Here's another simple sketch for those last minute Christmas cards. I know that I'm still working on all of mine. Sometimes, I feel as though I'm never gonna get them done and in the mail.
I cut my card base to a 5x5 square and covered the front with the Flurries and frost paper from Deja Views. I stamped my main image and colored her with prismacolor pencils and OMS. I added glitter to her wings and used my stardust gel pen to add some sparkle to the snowflakes. Both the main panel and the sentiment panel are matted twice with different colored blue cardstock from Bazzill.
Supplies:
Designer Paper - Deja Views, flurries and frost
Angel Stamp - Lockhart stamp company
Sentiment - Impress rubber stamps
Small snowflakes on the sentiment panel are from TAC
Ink - Palette Noir
Glitter
Stardust pen
Monday, November 26, 2007
Technique Challenge - TP casting
I just wanted to share with you a technique challenge over at A Shade of Blue. I just recently decided to be a part of their challenge team and came up with this fun technique to try!
It's called TP casting and you can find the instructions here.
Supplies:
Scott single ply toilet paper
Stamp (Snowman from The Angel Company)
Sentiment - The Angel Company
Tree's - SU, lovely as a tree
Paper - HOTP
Glitter
Stardust glitter pen
It's called TP casting and you can find the instructions here.
Supplies:
Scott single ply toilet paper
Stamp (Snowman from The Angel Company)
Sentiment - The Angel Company
Tree's - SU, lovely as a tree
Paper - HOTP
Glitter
Stardust glitter pen
Sunday, November 25, 2007
Card Sketch #37 - Make a Wish
Here is sketch #37. I decided to get out of the Christmas card making stretch with this one, and went totally in a different direction.
First of all, use your embossing buddy and go over your card stock. Stamp images with versamark and sprinkle with embossing powder. I just love the Glacier white EP I bought from CHF, it's the best on the market in my opinion. See link below. Anyway, I had a little bit of the EP left on the card stock when I heated it up, but thought that it looked like someone had blown on the dandelions to make a wish! I didn't plan it that way intentionally, but it worked out great in the end!
I cut the main panel in three separate equal parts and mounted it on white pearlized glimmer paper. Then popped that up on the yummy designer paper! I added the gray ribbon and cut out the sentiment with the window word punch and attached it on the ribbon!
Supplies:
Stamps by Heidi Grace
Black card stock
Versamark
Glacier White embossing powder by Cornish Heritage Farms
Pearlized white paper by paper accents
Designer paper is from the luxury stack by DCWV
Gray ribbon
Criss-Cross Card
I finally got to do a criss cross card! I had to make one and totally muck it up before I got one that looked half way decent. How fun this was to make and oh, the possibilities with all the great designer papers out there!
Supplies:
Green and red Cardstock by DCWV
Designer paper - Best Creation, Inc.
Green ribbon
Stamps - Gina K Designs
Supplies:
Green and red Cardstock by DCWV
Designer paper - Best Creation, Inc.
Green ribbon
Stamps - Gina K Designs
Wednesday, November 21, 2007
Card Sketch #36 - hello
Happy Thanksgiving everyone!
Here's my latest sketch design. Fast, simple and very versatile!
The main image is Flaky Friends from Stampin' Up! I just love this group of snowmen! Stamped with Palette Noir ink and colored with my Glaze gel pens from Sakura.
The hello sentiment is from tag tidbits from The Angel Company. I cut the scalloped squares from my cuttlebug dies and mounted them with dimensionals. The two background panels are also popped up with dimensionals.
Supplies:
White card stock base
Designer paper - Deja Views flurries & frost
White textured card stock by DCWV
Ink - Palette Noir
Glaze gel pens
Dimensionals
I get to host Thanksgiving dinner again this year. It's going to be a rather small affair, but cozy all the same! I hope that everyone has a safe and fun Thanksgiving with family and friends! Don't eat too much, remember that Christmas is right around the corner and we need to save room for all the goodies that that Holiday has to offer!
Saturday, November 17, 2007
Direct to paper polished stone technique
Here's a way to get that polished stone technique even if you don't have any re-inkers.
Gather your supplies:
Pigment inks
Glossy white card stock
Alcohol
cotton
Start off with a juicy pigment ink. I used colorbox petal point inks in slate blue, midnight and frost white.
Using the direct to paper technique, dab the midnight and slate blue onto your glossy card stock.
Next, wet your cotton with alcohol and dab onto the card stock blending the two inks.
Add more ink if desired and keep blending until you get something you like. Lastly, add the frost white and blend in a bit to lighten and highlight.
Once done, let dry and use as a back ground for your card. I used mine for the card sketch challenge on SCS, see link here.
Here's my finished card.
Stamps used:
Snowmen is from Winter tags by The Angel Company
Sentiment by Great Impressions
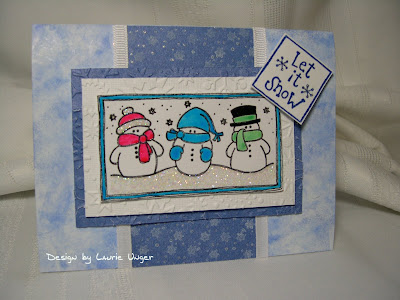
Other supplies and details
Inks - see above and Palette Noir
Colored with glaze gel pens.
Glitter used on the left snowman for his hat and for the snow.
Paper - Hot off the Press
Cuttlebug snowflake embossing folder
Tuesday, November 13, 2007
Card Sketch #35 - Many Thanks
Here's my latest sketch that uses a ATC as the main panel.
I stamped this image before leaving on a business trip and colored it in while I was away. This image is also blended with baby oil instead of my faithful OMS.
I distressed the ATC with my edge distresser and then used tea stain distress ink from Ranger along the edges. The dark brown panel is stamped with the weathered back ground stamp in versamark and then embossed with clear EP.
Putting the back ground layers at a slight angle creates some visual interest to the main stamped image and sets it off.
Supplies:
The card base is corrugated craft by paper reflections.
gingham paper from DCWV
Brown card stock by DCWV
Twine
Photo corners/brads
Ink - Palette Noir
Distress ink from Ranger
Clear embossing powder
Versamark
Stamps:
Weathered by Stampin' Up
Sunflower by The Angel Company
Many Thanks by The Angel Company (tag tid bits)
Saturday, November 10, 2007
I've been tagged
By Niki over at paper creations. Her blog link is under the SBS badge.
Here we go....
1. If you could have 100.00 worth of scrapbook paper or assorted embellishments, which would you choose? Embellishments! I have a lot of designer paper that I haven't used, so more paper would be too daunting for me to try and use up.
2. If you had to choose between using only stamps or ribbons, which would you choose? Stamps....hands down, no choice for me there.
3. If you knew how to do both awesome cards and layouts but could only do one for a whole year…which would you do? Cards, they're quicker and I tend to spend too much time on layouts and change my mind on them way too frequently mid stream.
4. Would you rather own a scrap booking store or have your own scrapping room at home? I have my own stamping/scraping room already.
5. What is your CURRENT card making or scrapping style? Simple because I like clean lines, however I'm trying to broaden my style with new ideas and designs.
Here are the rules…………..Please answer the questions on your blog and tag 5 more people to answer the same questions……….make sure you list on your blog who you are tagging….
Tagging these people:
Jennfier Liebelt
Becky Stewart
Samm Livett
Cheryl
Barb
Friday, November 9, 2007
Sisterhood of the blogging stampers
Factoid:
I've been married for 21 years to a wonderful outdoor's man. We love to travel, RV and fish during the summer months, or whenever we can. We are the proud parents of a furry four legged dog (half siberian husky, half golden retriever) named Dylan.
I'm an Angel Company demonstrator/hobbiest and respect and enjoy just about any stamp companies images. You know how it is, if you like it, buy it!
When people first meet me, they think I'm a girlie girl. But I'm a tom boy at heart! Please visit some of the excellent blogs listed under the SBS badge on your right! There are a lot of really great ideas and lots of inspiration for you to browse through.
Wednesday, November 7, 2007
Card Sketch #34 - Cardinal
Here is sketch #34, nice and easy with lots of possibilities!
The main image is colored with prismacolor pencils and blended with baby oil. I tried this technique while I was on the road and couldn't bring my OMS with me. I was actually very pleased with the results. I took some creative license with the image, and made it into a Cardinal. Hopefully it looks like one!
My white card base is covered with paper that is from Paper Pizazz (Christmas 8X8 papers). The main image is matted with red bling and green that matches the plaid. Twine is added in the back ground to match the nature theme of this card. Instead of using black brads in the corner, I added black dots using my gel glaze pen. Basically this was an after thought, since I already had the image popped up and on the card. Thanks for looking and have a great week.
Stamps: The Angel Company - All things nature
Sentiment - Inkadinkado Silhouettes
Saturday, November 3, 2007
Card Sketch #33 - Snowflake Medley
Card Sketch #33 is all about snowflakes, or shall I say rectangles and diamonds. I repeated the diamond shape from the previous sketch but changed some things around.
I found this really great winter/Christmas paper at the local Ben Franklin store from the Paper Company called Snowflake Stripe and Snowflake Medley, and thought I'd put it to use for this sketch.
The snowflakes are stamped using colorbox ink in Azurite and then embossed with clear embossing powder. Both panels are matted with dark blue card stock from DCWV. I used my cuttlebug snowflake die to cut out the white snowflakes that are attached on the right side of the card. Two of them are attached with some small blue snowflake brads from Making Memories. I also used a white big brad and attached the "Believe" rub on to it, both are from HOTP.
Stamps: Provocraft let it snow
Hope everyone is having or had a wonderful weekend!
Thursday, November 1, 2007
Card Sketch #32
Here is card sketch #32, which has a lot of layers, but is fun to work with. Using some really nice designer paper on the layers really adds interest to this sketch.
I started off with white cardstock as my base. I used the swirls stamp set by stampendous to add the holly swirl background, which was inked up using Palette Jardin Moss. The striped paper is from Impress rubber stamps. I used some gold metalic paper and cut out a square using my marvy giga scalloped punch. Punched out another square and stamped the sentiment on, which is from stampendous. The corner stamps are from the set Curly Q's by Fiskars. Both were stamped in Palette Jardin Moss. I added some green ribbon to finish the card off.
Stamps used:
Stampendous - Swirls (clear acrylic)
Fiskars - Curly Q's (clear acrylic)
Paper: Impress rubber stamps Holiday collection (green stripes) Gold Metalic
Can you believe it's November already? Where does the time go? Have a great week everyone!
Monday, October 29, 2007
Card Sketch #31 - Tree Silhouettes
Here is card sketch #31.....wow the numbers keep adding up! This is a simple one thats great for it's versatility.
I started off with green cardstock and added some craft cardstock as the top layer. The image is done on white and layered with green CS and red bling by bazzill. The tree silhouette image is from Inkadinkado (called silhouettes) and stamped in colorbox warm green chalk ink. I stamped the image once and then stamped it again, as I did in the previous sketch. I then added some glitter bling to the trees with my stardust pen from Sakura. Can't ya tell I just love this stamp set?!
I stamped the sentiment in the same ink and embossed it with clear embossing powder. I then added ribbon and thought that it needed a little more, so added the bow at the last minute. I also did a little paper piercing in the corners. Overall, I think this card will be great for guy, kind of masculine in it's appearance, except for the bow.
I'm in Richland, Washington for two weeks of training for my new job. I was expecting to see some snow driving over Snoqualamie pass, but nothing yet. I'm going to keep my fingers crossed that it stays that way until after I have to drive home! So, as you can tell, I've done up a few sketches and cards to share while I'm away. Stay tuned......
Friday, October 26, 2007
Card Sketch #30 - Silver Shadow
Here is sketch #30!
I found some new stamps from Inkadinkado called silhouettes and had to put them to use for this one.
I used my marvy mega square punch to punch three squares and then rounded the corners. I thought to do something a little different with the squares and taped them together before stamping. I stamped the tree in Palette jardin moss, stamped it off once to create the shadow effect and repeated till I filled all three squares.
I stamped the Holiday sentiment in versamark and embossed with silver ep. I also added a rim of silver embossing around the squares. I added some sparkle to the tree's with my stardust gel pen from Sakura. Silver ribbon finishes off the card.
Have a great weekend everyone!
TAC Final Farewell's and specials
The Angel Company has released their 2007 retired list of stamps that will not appear in the Spring 2008 catalogue. Below is this list.
They are also a few favorite paper collections that will be retiring as well and are on clearance. Bella Flor and Kaleidoscope Brites are now $10.00!
The paper that I have pictured below are now $3.50 each!
They are also a few favorite paper collections that will be retiring as well and are on clearance. Bella Flor and Kaleidoscope Brites are now $10.00!
The paper that I have pictured below are now $3.50 each!