Gather your supplies:
Pigment inks
Glossy white card stock
Alcohol
cotton

Start off with a juicy pigment ink. I used colorbox petal point inks in slate blue, midnight and frost white.
Using the direct to paper technique, dab the midnight and slate blue onto your glossy card stock.

Next, wet your cotton with alcohol and dab onto the card stock blending the two inks.


Add more ink if desired and keep blending until you get something you like. Lastly, add the frost white and blend in a bit to lighten and highlight.

Once done, let dry and use as a back ground for your card. I used mine for the card sketch challenge on SCS, see link here.
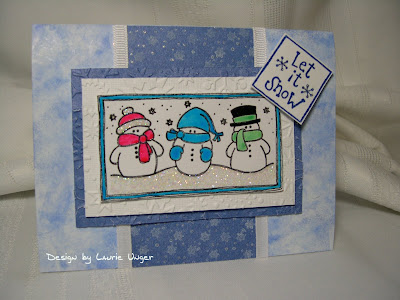
Here's my finished card.

Stamps used:
Snowmen is from Winter tags by The Angel Company
Sentiment by Great Impressions
Other supplies and details
Inks - see above and Palette Noir
Colored with glaze gel pens.
Glitter used on the left snowman for his hat and for the snow.
Paper - Hot off the Press
Cuttlebug snowflake embossing folder
I love the card! The technique you used looks mess-free and the result is wonderful. I've been considering buying that stamp set, but keep putting it off. Looks like it's time. :) Thanks for a super tutorial.
ReplyDeleteLove the card! Thanks for sharing the tutorial - this looks like something I could actually do!
ReplyDeleteWow great card thanks for sharing the tutorial with us!
ReplyDeleteThats a great technique, thanks for sharing!
ReplyDeleteGeez...That card really turned out beautiful. Thanks for the tutorial!
ReplyDeleteCute card! Thanks for showing how to do this technique.
ReplyDeleteI love your card! Nice technique too! Thanks for showing us how!
ReplyDeleteHiya Laurie! What a great card! I am in the 2nd Sisterhood group and thought I would stop by to say hello! Really like your blog! Take care!
ReplyDeleteGreat job with the tutorial...and awesome card!
ReplyDeleteI love all the glitter on the card. Thanks for sharing the tutorial for the technique. :0)
ReplyDeleteWhat a great technique! I am eager to try this! Thanks for the tutorial! The pictures with written directions are great!
ReplyDelete